


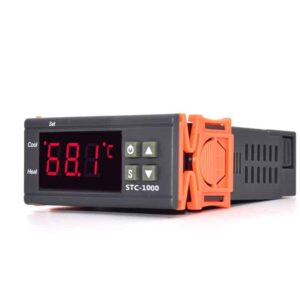
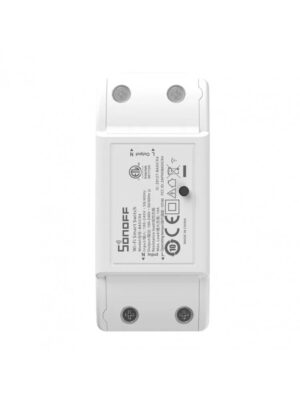
The STC-1000 12VDC Temperature Controller is a self-contained heating / cooling controller that operates on 12VDC and can control either AC or DC loads of up to 10A.
PACKAGE INCLUDES:
- STC-1000 12VDC Temperature Controller
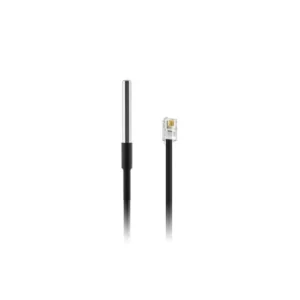
- 1m (36″) long temperature sensor probe
KEY FEATURES OF STC-1000 12VDC TEMPERATURE CONTROLLER:
- Large 3-digit display of measured temperature
- Operates in both a heating and cooling mode of operation
- Programmable settings for temp set point, temp hysteresis, compressor delay and temperature calibration.
- Waterproof NTC temperature sensor has -50 to +99.9°C measurement range with ±1°C accuracy
- Over temperature and sensor failure audible and visual alarm
- Unit temperature reading can be calibrated
- Relays switch up to 120/240VAC @ 10A or 15VDC @ 10A
- 12VDC module operation
This unit can be used for controlling many different heating and cooling devices such as heaters, refrigerators, freezers, heat tapes, vivariums, fermentation tanks, industrial equipment and other temperature controlled systems.
It contains two independent output relays that can be turned ON or OFF as temperature rises or lowers past a thermal threshold that you set. You can also set a temperature differential between heating and cooling, set a compressor delay to avoid turning a compressor on and off too frequently as well as apply a calibration offset to the temperature reading.
A built in MCU allows you to configure the module using the display and 4 pushbuttons. All settings can be saved into non-volatile memory and are preserved during a power cycle.
The temperature is sensed by a waterproof NTC thermistor that has a range of -50°C to 99.9°C (-58°F to 211°F) . The sensor cable is about 36″ long, but it is possible to splice the wire to lengthen the cable if needed.
The relays are rated for up to 120/240VAC @ 10A and 15VDC @ 10A. When one of the relays is energized a red Heat or Cool LED is lit. It is also possible to use the relays on this module to switch higher power relays or contactors if you want to control a lot of power.
Module Power
The module itself is powered from 12VDC which is connected to the screw terminal block marked Power Supply. It is a hardwired connection, so typically the female end of a 12VDC wall bug is cut off and the wires stripped and inserted into the screw terminals or wires can be run from a terminal strip. This DC input is not polarized and 12VDC/ Gnd leads can be swapped between the terminals as they feed into a full-wave rectifier circuit.
When module power is first applied, if the Compressor Delay Time has been set to something besides 0, the Cool LED will flash for the number of minutes set by this delay time. This is designed to help prevent compressor damage by turning the compressor ON/OFF quickly in case of power glitches.
Note: The module power is independent of the power that is being switched by the heating and cooling relays in the unit.
Display
The module has a 3-digit display composed of two 0.50″ high red 7-segment displays plus a smaller 3rd digit.
The module will always display the current temperature measurement by default. it is displayed in degrees Celsius and cannot be switched to show Fahrenheit.
If the ∧ (up) button is pressed, the current Set temperature is displayed. This is the center of the desired temperature range that you want to maintain. This is stored in the F1 user setting described below.
If the ∨ (down) is pressed, the current Difference temperature is displayed. This is the +/- temperature hysteresis around the set temperature that is allowable. This is stored in the F2 user setting described below.

If you apply power to the module without the sensor attached, it will display ‘EE‘ and a loud audible alarm will sound. Pressing any button will silence the alarm. If you plug in the sensor, the current temperature will be displayed which is generally in the 20-25°C range for room temperature.
There are several LED indicators on the module as well:
Cool (steady ON) – Indicates the cooling relay is energized (switch is closed)
(blinking) – Indicates it is in compressor delay mode (switch will remain open for x minutes even though switching temperature has been reached
Heat – Indicates the heating relay is energized (switch is closed)
Set – Indicates the module is in programming mode and parameters can be changed.
If both the Cool and Heat LEDs are off, it indicates the temperature is within the programmed acceptable range. Both LEDs cannot be on at the same time (both heating and cooling at the same time).
Buttons
There are 4 buttons on the module that you can fiddle with.
- Power = Long Press turns power ON or OFF. Short Press saves current settings when in SET program mode.
- S = Long Press puts module into program Set mode and the Set LED lights.
- ∧ = In normal operation, causes temperature Set value to be displayed. Increments value when in program set mode
- ∨ = In normal operation, causes temperature Difference value to be displayed. Decrements value when in program set mode
Programmable User Settings
There are 4 user programmable settings. These are accessed by giving the S button a long press until the Set LED lights and F1 is displayed. The Set mode times out after about 3 seconds of inactivity.
- F1 Temperature Set Value (-50°C to 99.9°C)
- F2 Temperature Difference Value (0.3°C to 10.0°C)
- F3 Compressor Delay Time (0 to 10 minutes)
- F4 Temperature Calibration Offset (-10.0°C to +10.0°C)
Because the user interface is limited to a 3-digit display and 4 pushbuttons, setting parameters can seem a little confusing at first, but it is actually fairly easy to use as explained in this section. Main thing is to wrap you head around what each of the settings does. Also remember that if you delay without pressing any buttons for too long and the display reverts back to the default temperature display before saving the settings, the settings you were working on were not saved and you will need to enter the Set mode and start over again.
Note: Some units may save the settings automatically without having to explicitly save them.
F1 – Setting Temperature SET Value
 The F1 Set temperature is the center of the temperature range that you want to maintain. If you wanted to maintain a temperature range of 25-30°C for instance, you would set F1 to the mid-point of 27.5°C. If you press the ∧ button during normal operation, it will display the current F1 setting.
To change this setting, long press the Set button until the Set LED is lit and the display shows F1.
 Press and hold the Set button while pressing the ∧ /∨ buttons to change the temperature on the display. When the desired temperature has been reached, quickly short press the Power button to save the setting. If the display is instead allowed to time out after 3 seconds and revert to the normal display, the new setting will not be saved.
F2 – Setting Temperature DIFFERENCE Value
 The F2 Difference temperature is the ± temperature range from the Set temperature that you want to maintain. If you wanted to maintain a temperature range of 25-30°C (total range of 5°C), you would set F2 to half of that, which would be 2.5°C. If you press the ∨ button during normal operation, it will display the current F2 setting.
With these example settings, when the temperature lowers to 25°C, the Heat relay will be energized. When the temperature raises to the F1 Set value of 27.5°C the Heat relay will de-energize. Conversely when the temperature increases to 30°C, the Cool relay will be energized. When the temperature lowers to the F1 Set value of 27.5°C the Cool relay will be de-energized.
To change this setting, long press the Set button until the Set LED is lit and the display shows F1. Use the ∧ /∨ buttons to navigate to F2.
Press and hold the Set button while pressing the ∧ /∨ buttons to change the Difference temperature shown on the display. When the desired Difference temperature has been reached, quickly short press the Power button to save the setting. If the display is instead allowed to time out after 3 seconds and revert to the normal display, the new setting will not be saved.
F3 – Setting Compressor DELAY Time
 The F3 Compressor Delay Time is a delay on the cooling side which can be set from 0-10 minutes. When the Cooling relay is first de-energized, it will remain OFF for a minimum time in minutes as determined by the F3 setting. When the Compressor Delay is active, the cooling LED will blink
If the controller is used to operate a compressor, such as on a refrigerator, you don’t want to turn the compressor ON/OFF very quickly as it could damage the compressor so this setting helps to protect the compressor. A setting of 3 minutes is typically fine when used with a compressor. If no delay is desired such as when using to control a fan for cooling, the setting can be set to 0.
To change this setting, long press the Set button until the Set LED is lit and the display shows F1. Use the ∧ /∨ buttons to navigate to F3.
Press and hold the Set button while pressing the ∧ /∨ buttons to change the Compressor Delay Time as shown on the display. The display is in minutes. When the desired delay time has been reached, quickly short press the Power button to save the setting. If the display is instead allowed to time out after 3 seconds and revert to the normal display, the new setting will not be saved.
F4 – Temperature Calibration OFFSET
 The unit has a nominal temperature accuracy of ±1°C with 0.1°C display resolution.
If the temperature accuracy is found to be incorrect or it is desired to match the reading of this unit with another measurement device, an offset of up to -10.0°C to +10.0°C can be applied to the temperature reading before it is displayed.
 An easy way to calibrate the unit at 0°C is to use an ice/water bath to submerge the temperature sensor. After allowing the temperature reading to stabilize for a couple of minutes, the reading should be 0.0°C ±1.0°C. If the reading was instead +2°C for instance, you could program a -2°C offset to correct the reading to 0.0°C.
To change this setting, long press the Set button until the Set LED is lit and the display shows F1. Use the ∧ /∨ buttons to navigate to F4.
Press and hold the Set button while pressing the ∧ /∨ buttons to change the Temperature Calibration Offset as shown on the display. When the desired offset has been reached, quickly short press the Power button to save the setting. If the display is instead allowed to time out after 3 seconds and revert to the normal display, the new setting will not be saved.
MODULE CONNECTIONS

STC-1000 12VDC – Connections
To access the screw terminals, temporarily remove the back cover by depressing the tabs on either side of the back cover.
The screw terminals can handle up to 18AWG wire.
1 x 2 Screw Terminal Block (left as viewed from back of module)
- Power Supply = 1 lead of 12VDC power cable (12V or Gnd)
- Power Supply = 1 lead of 12VDC power cable (12V or Gnd)
1×2 XH2.54 White Connector
The temperature sensor plugs into the white connector. It is keyed and will only go in one way though the orientation does not matter.
1 x 2 Screw Terminal Block (center as viewed from back of module)
- Heating = Relay switch contact 1
- Heating = Relay switch contact 2
1 x 2 Screw Terminal Block (center as viewed from back of module)
- Cooling = Relay switch contact 1
- Cooling = Relay switch contact 2
The relay switch contacts are interchangeable. One side should connect to the power for the load which can either be AC or DC voltage and the other side should connect to the load itself.
The drawing here shows a typical setup where the unit is operating on 120VAC and also controlling heating and cooling devices that also operate on 120VAC.

MODULE MOUNTING
 The module can be simply left free standing or strapped down somehow to keep them in place but they are primarily designed to be panel mounted.
If using the module panel mounted, a rectangular panel opening of approximately 3.1″ x 1.1″ is required. Panels up to 1/2″ thick can be supported with movable red slide latches on either side of the module.
To mount the module, remove the red slide latches by depressing the center ribbed portion to release it and slide it backward off the module. Insert the module through the opening and then slide the red slide latches back onto the unit and push them forward until they lock the unit in place.
You will need a little room on both sides of the module to slide these latches in place or to release them if the module needs to be removed for some reason.
TECHNICAL SPECIFICATIONS
| Temperature Control | ||
| Temperature Range | -50 ~ 99.9°C | |
| Display Resolution | 0.1°C | |
| Accuracy | ±1°C (over range of -50 – +70°C) | |
| Thermal Sensor | NTC Thermistor | |
| Relay Maximum Ratings | ||
| VAC | 120VAC / 240VAC | 10A (< 8A recommended) |
| VDC | 0-15VDC | 10A (< 8A recommended) |
| Operating Ratings | ||
| DC Power Input | 12VDC | |
| Power Consumption | < 2W (measured) | |
| Dimensions | L x W x H | 86 x 75 x 34mm (3.39 x 2.95 x 1.34″) |
| Panel cutout dimensions | 71 x 29mm (3.1 x 1.1″) | |
| Temperature probe length | 100cm (36″) |


Reviews
There are no reviews yet.